Call for a free consultation 1.866.380.1708
What to Do When Your Server Room Gets Wet: Immediate Restoration Steps
Discover essential steps to take when your server room gets wet. Learn how to minimize downtime and prevent long-term damage from water contamination in server environments.
2 min read
When a server room experiences water contamination, immediate action is crucial. Whether caused by a burst pipe, flooding, or sprinkler malfunction, water damage can threaten your IT infrastructure, compromise sensitive data, and bring your operations to a halt. This guide outlines the essential restoration steps to protect your business continuity and server performance.
First Response: Ensure Safety and Shut Down Power
Before touching any equipment:
Turn off electricity to the affected area from the main breaker to avoid electrocution.
Do not enter standing water if power is still on.
Notify your IT and facilities teams immediately.
If safe, document the damage with photos for insurance claims.
Step 1: Remove Water and Dehumidify the Server Room
Once the area is safe:
Use wet/dry vacuums or water pumps to extract standing water.
Deploy commercial-grade dehumidifiers and air movers to lower humidity quickly.
Open any access panels or flooring to expose hidden dampness.
Maintain temperatures between 68–77°F and relative humidity under 60% during drying.
Step 2: Begin Technical Cleaning of Server Equipment
Moisture can leave behind corrosive residues that damage electronics even after drying. Follow these precautions:
Do not power on wet electronics.
Remove affected equipment and send to a specialized electronic restoration provider.
Clean any exposed surfaces using anti-static wipes and isopropyl alcohol where safe.
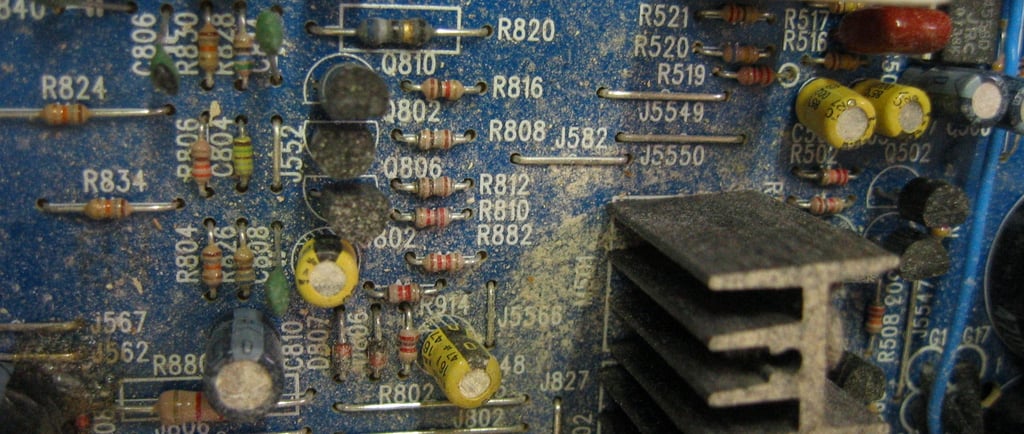
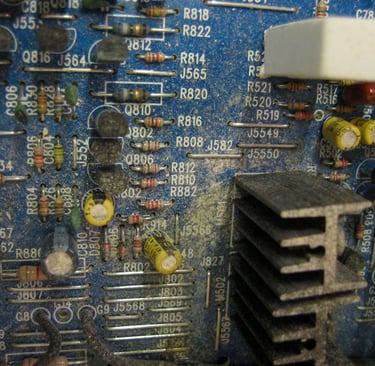
Inspect for visible corrosion or residue on PCBs, rack systems, and connectors.
Step 3: Assess Damage and Begin Recovery
Once equipment is dry and cleaned:
Test each device in a controlled, isolated environment before returning it to the rack.
Assess if hard drives, switches, or servers suffered permanent damage.
Restore data from backups if critical storage was compromised.
Replace any non-recoverable or warranty-voided components.
Step 4: Sanitize and Seal the Environment
After the restoration:
Clean and sanitize all surfaces in the server room, including subfloor areas.
Ensure HVAC systems are dry and functional.
Consider resealing cracks or replacing materials like carpets or tiles to prevent future contamination.
Step 5: Review Infrastructure and Mitigate Future Risk
Once operations are restored, conduct a post-incident review:
Identify the source of water intrusion—plumbing, roofing, HVAC leak, etc.
Install leak detection systems and water sensors beneath raised floors or near critical assets.
Develop or revise your disaster recovery plan (DRP) and include a water-specific response protocol.
Schedule regular environmental inspections for your server room.
Final Thoughts
Water in a server room is a critical emergency that requires swift, informed action. From the moment contamination is detected to full restoration, every minute counts. Proper server room cleaning, technical restoration, and future-proofing can mean the difference between a minor setback and catastrophic data loss.
If your organization lacks the in-house expertise or resources for full recovery, partnering with an electronic restoration specialist can accelerate your return to full functionality—safely and efficiently.

Contact
RescueTech
1.866.380.1708
contact@rtcer.com
© Copyright 2002 – 2026 : RescueTech, Inc